The Service Assistant lets you reset the service indicator in just a few clicks after a completed service. You don’t need to look up any channels by hand – you simply select the matching job, and CarPort enters the correct values for you.
1. Which message does your instrument cluster show?
The multi-function display (MFD) in the instrument cluster shows what is due. This message is your starting point – it determines which job you select:
| Message in the MFD | Matching job |
|---|---|
| Oil change now! / Oil service now! / Service now! | “Oil Service Reset” |
| Inspection now! | “Inspection Reset” |
| Oil change and inspection now! / Oil service and inspection now! | “Oil Service and Inspection Reset” |
The exact wording varies by model, market and software version. Some clusters show “Oil change now!”, others “Oil service now!” or simply “Service now!” – they all refer to the same oil service. On clusters without text, a spanner symbol appears with a 1 (inspection) or 2 (oil service) in the top right corner.
Note which message was shown – it determines your selection in Step 4.
2. Prerequisites
- Diagnostic interface is connected (the status bar at the bottom shows e.g. “Connected to AutoDia K509. Adapter ready.”)
- Ignition on, engine off
- Stable vehicle voltage (connect a battery charger if necessary)
- The actual service (oil change / inspection) has been completed
3. Opening the Service Assistant
- In the toolbar, click “Start Service Assistant”.
- CarPort opens the Service Assistant tab and reads the vehicle’s current values.
4. Selecting and running a job
- At the top, under “Jobs”, open the “Please select:” drop-down.
- Choose the job that matches your message from Step 1:
- Oil Service Reset
- Inspection Reset
- Oil Service and Inspection Reset
- CarPort automatically enters the required values in the New value column.
- Click “Save changes…” at the bottom right.
That’s it – CarPort writes the values to the control module and reads them back for confirmation.
5. What the jobs do in the background
You don’t need to know this in detail, but for orientation:
- Oil Service Reset: Sets only channel 8754 to “Reset”. The control module then applies the WIV channel changes required for the oil service by itself (assuming the oil quality is unchanged).
- Inspection Reset: Sets only channels 8870 and 8871 to 0.
- Oil Service and Inspection Reset: Performs both actions together.
6. Checking the result
- Switch the ignition off and on again.
- Check the instrument cluster display – the service message should have disappeared and the remaining time/distance should be shown correctly.
- If the message persists: check whether you selected the correct job for the displayed message (see Step 1). For example, if only the oil service was reset, a due inspection will remain – and vice versa.
7. Notes
- Right message, right job: Oil service and inspection are separate intervals. Always reset what the MFD actually shows.
- Missing channels: Depending on the vehicle and coding, not all channels are visible – this is normal and not a fault.
- Digital cockpit (Active Info Display): The display and behaviour may differ slightly.
- Safety: Resetting only changes the display. Due maintenance work – in particular the timing belt replacement – must be carried out on time regardless of the reset.
8. Advanced: Switching the interval type (fixed ↔ LongLife)
Caution: This section is intended for experienced users. You do not need it for a normal service reset after an oil change – the jobs in Step 4 are sufficient for that. Only change the interval type if you deliberately want to switch from a fixed interval to LongLife (or vice versa). There is no dedicated job for this switch – it is done manually via the adaptation channels.
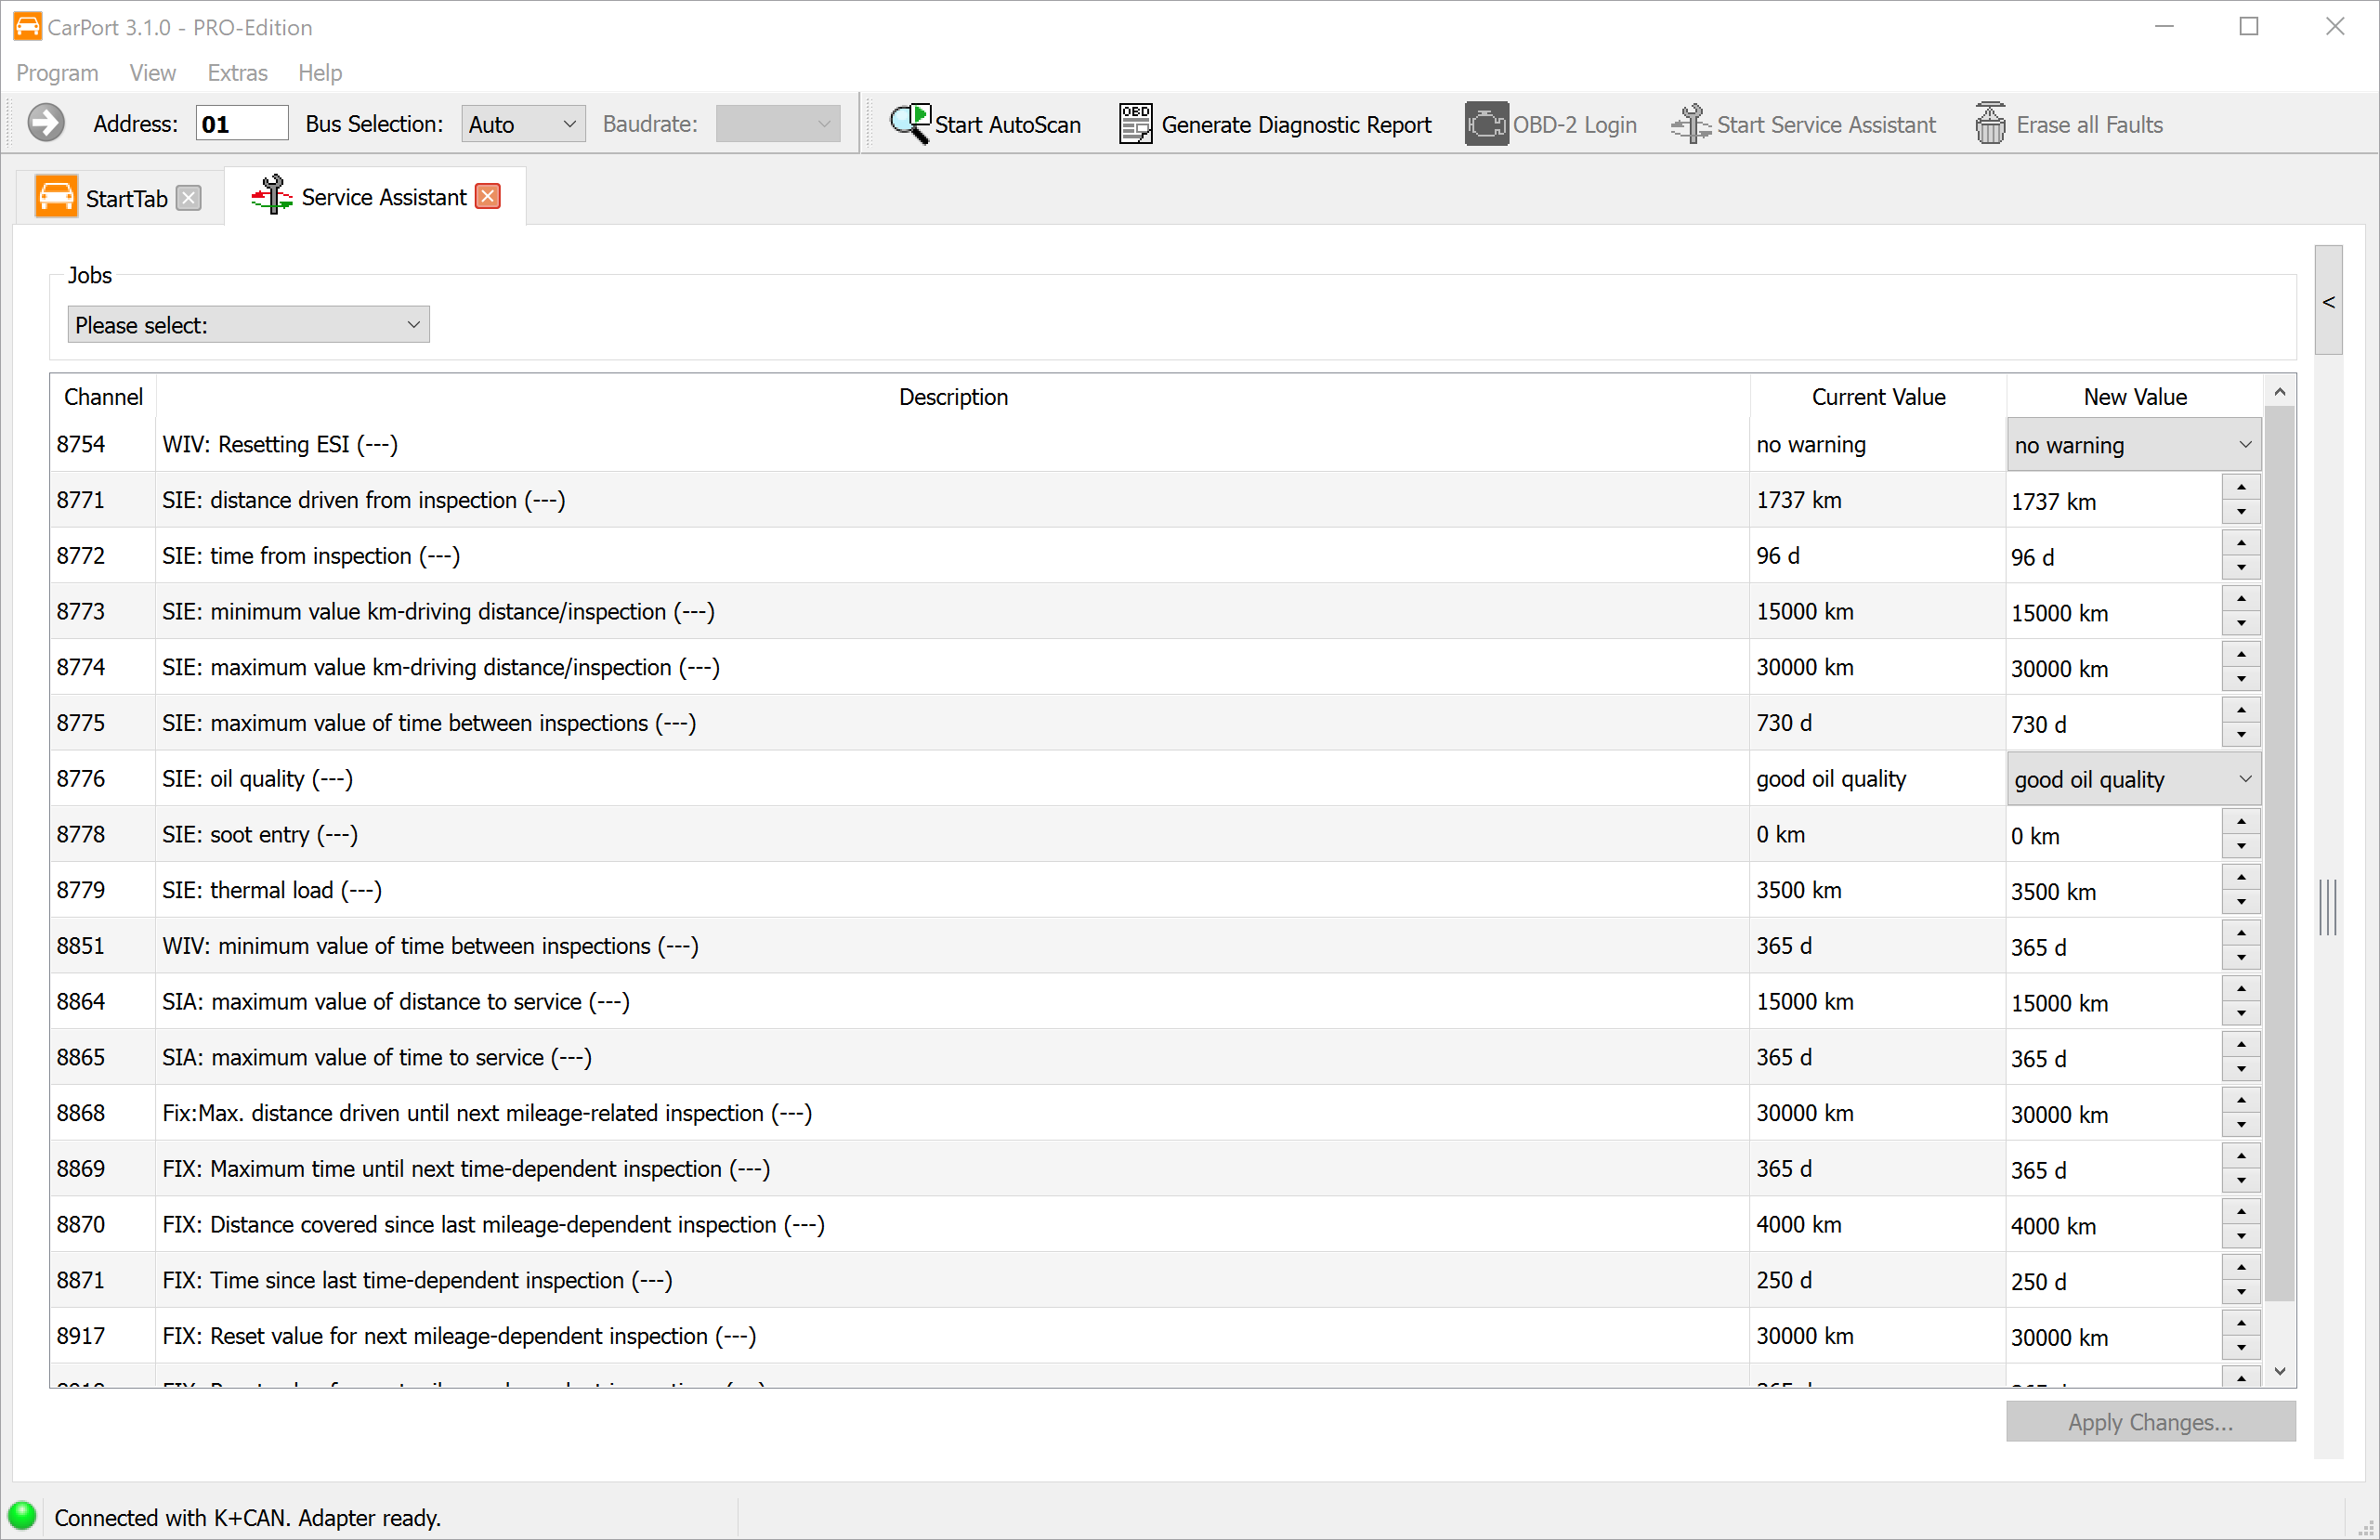
What “oil quality” really means
Channel 8776 (WIV: Oil quality) is not a pure oil value but the switch between the interval types:
| Value in channel 8776 | Interval type |
|---|---|
| poor quality | Fixed interval (15,000 km / 1 year) |
| good quality | Flexible / LongLife interval (up to 30,000 km / 2 years) |
Based on this value, the control module decides which calculation logic (WIV or SIA) it uses. The oil actually filled in is irrelevant for this channel – it only controls the display logic.
Why changing the oil quality alone is not enough
The actual interval length is not stored in the oil quality but in the min/max channels. If you change only channel 8776 and leave the limit values unchanged, the two no longer match – and the control module reports the fault “Basic setting not carried out” (B2010-00).
For this reason, oil quality and limit values must always be set together as a complete set.
Value sets for switching
Switch to LongLife / flexible (channel 8776 = good quality):
| Channel | Description | Value |
|---|---|---|
| 8776 | WIV: Oil quality | good quality |
| 8773 | WIV: Min. mileage/inspection | 15,000 km |
| 8774 | WIV: Max. mileage/inspection | 30,000 km |
| 8851 | WIV: Min. time between inspections | 365 d |
| 8775 | WIV: Max. time between inspections | 730 d |
| 8868 | FIX: Max. distance to next mileage-based inspection | 30,000 km |
| 8869 | FIX: Max. time to next time-based inspection | 730 d |
Switch to fixed interval (channel 8776 = poor quality):
| Channel | Description | Value |
|---|---|---|
| 8776 | WIV: Oil quality | poor quality |
| 8773 | WIV: Min. mileage/inspection | 15,000 km |
| 8774 | WIV: Max. mileage/inspection | 15,000 km |
| 8851 | WIV: Min. time between inspections | 365 d |
| 8775 | WIV: Max. time between inspections | 365 d |
| 8868 | FIX: Max. distance to next mileage-based inspection | 15,000 km |
| 8869 | FIX: Max. time to next time-based inspection | 365 d |
The key difference: with a fixed interval, the min and max values are equal (15,000 km / 365 d); with flexible, the max values widen to 30,000 km / 730 d.
⚠️ Important: The figures given here are example values. The correct target values depend on the engine and PR code (e.g. QI6 on some TDI models) and may differ. Before making changes, be sure to note down the originally stored values (the Stored value column) so you can restore them if needed.
Procedure
- In the New value column, enter the complete value set for the desired interval type (see the tables above).
- Click “Save changes…”.
- Then reset the service indicator using the matching job (Step 4) so that the counters and remaining time/distance are recalculated.
- After switching the ignition off/on, confirm that no “Basic setting not carried out” fault is stored. If it appears, the oil quality and limit values do not match – correct the value set.