
Basic settings & output test
Basic settings re-teach components such as the throttle body or steering angle sensor; the output test activates actuators specifically to check that they work.
Both functions actively trigger processes in the ECU—so pay attention to the safety notes in the individual sections. As with coding and adaptation, security access or an SFD unlock may be required first.
Basic settings
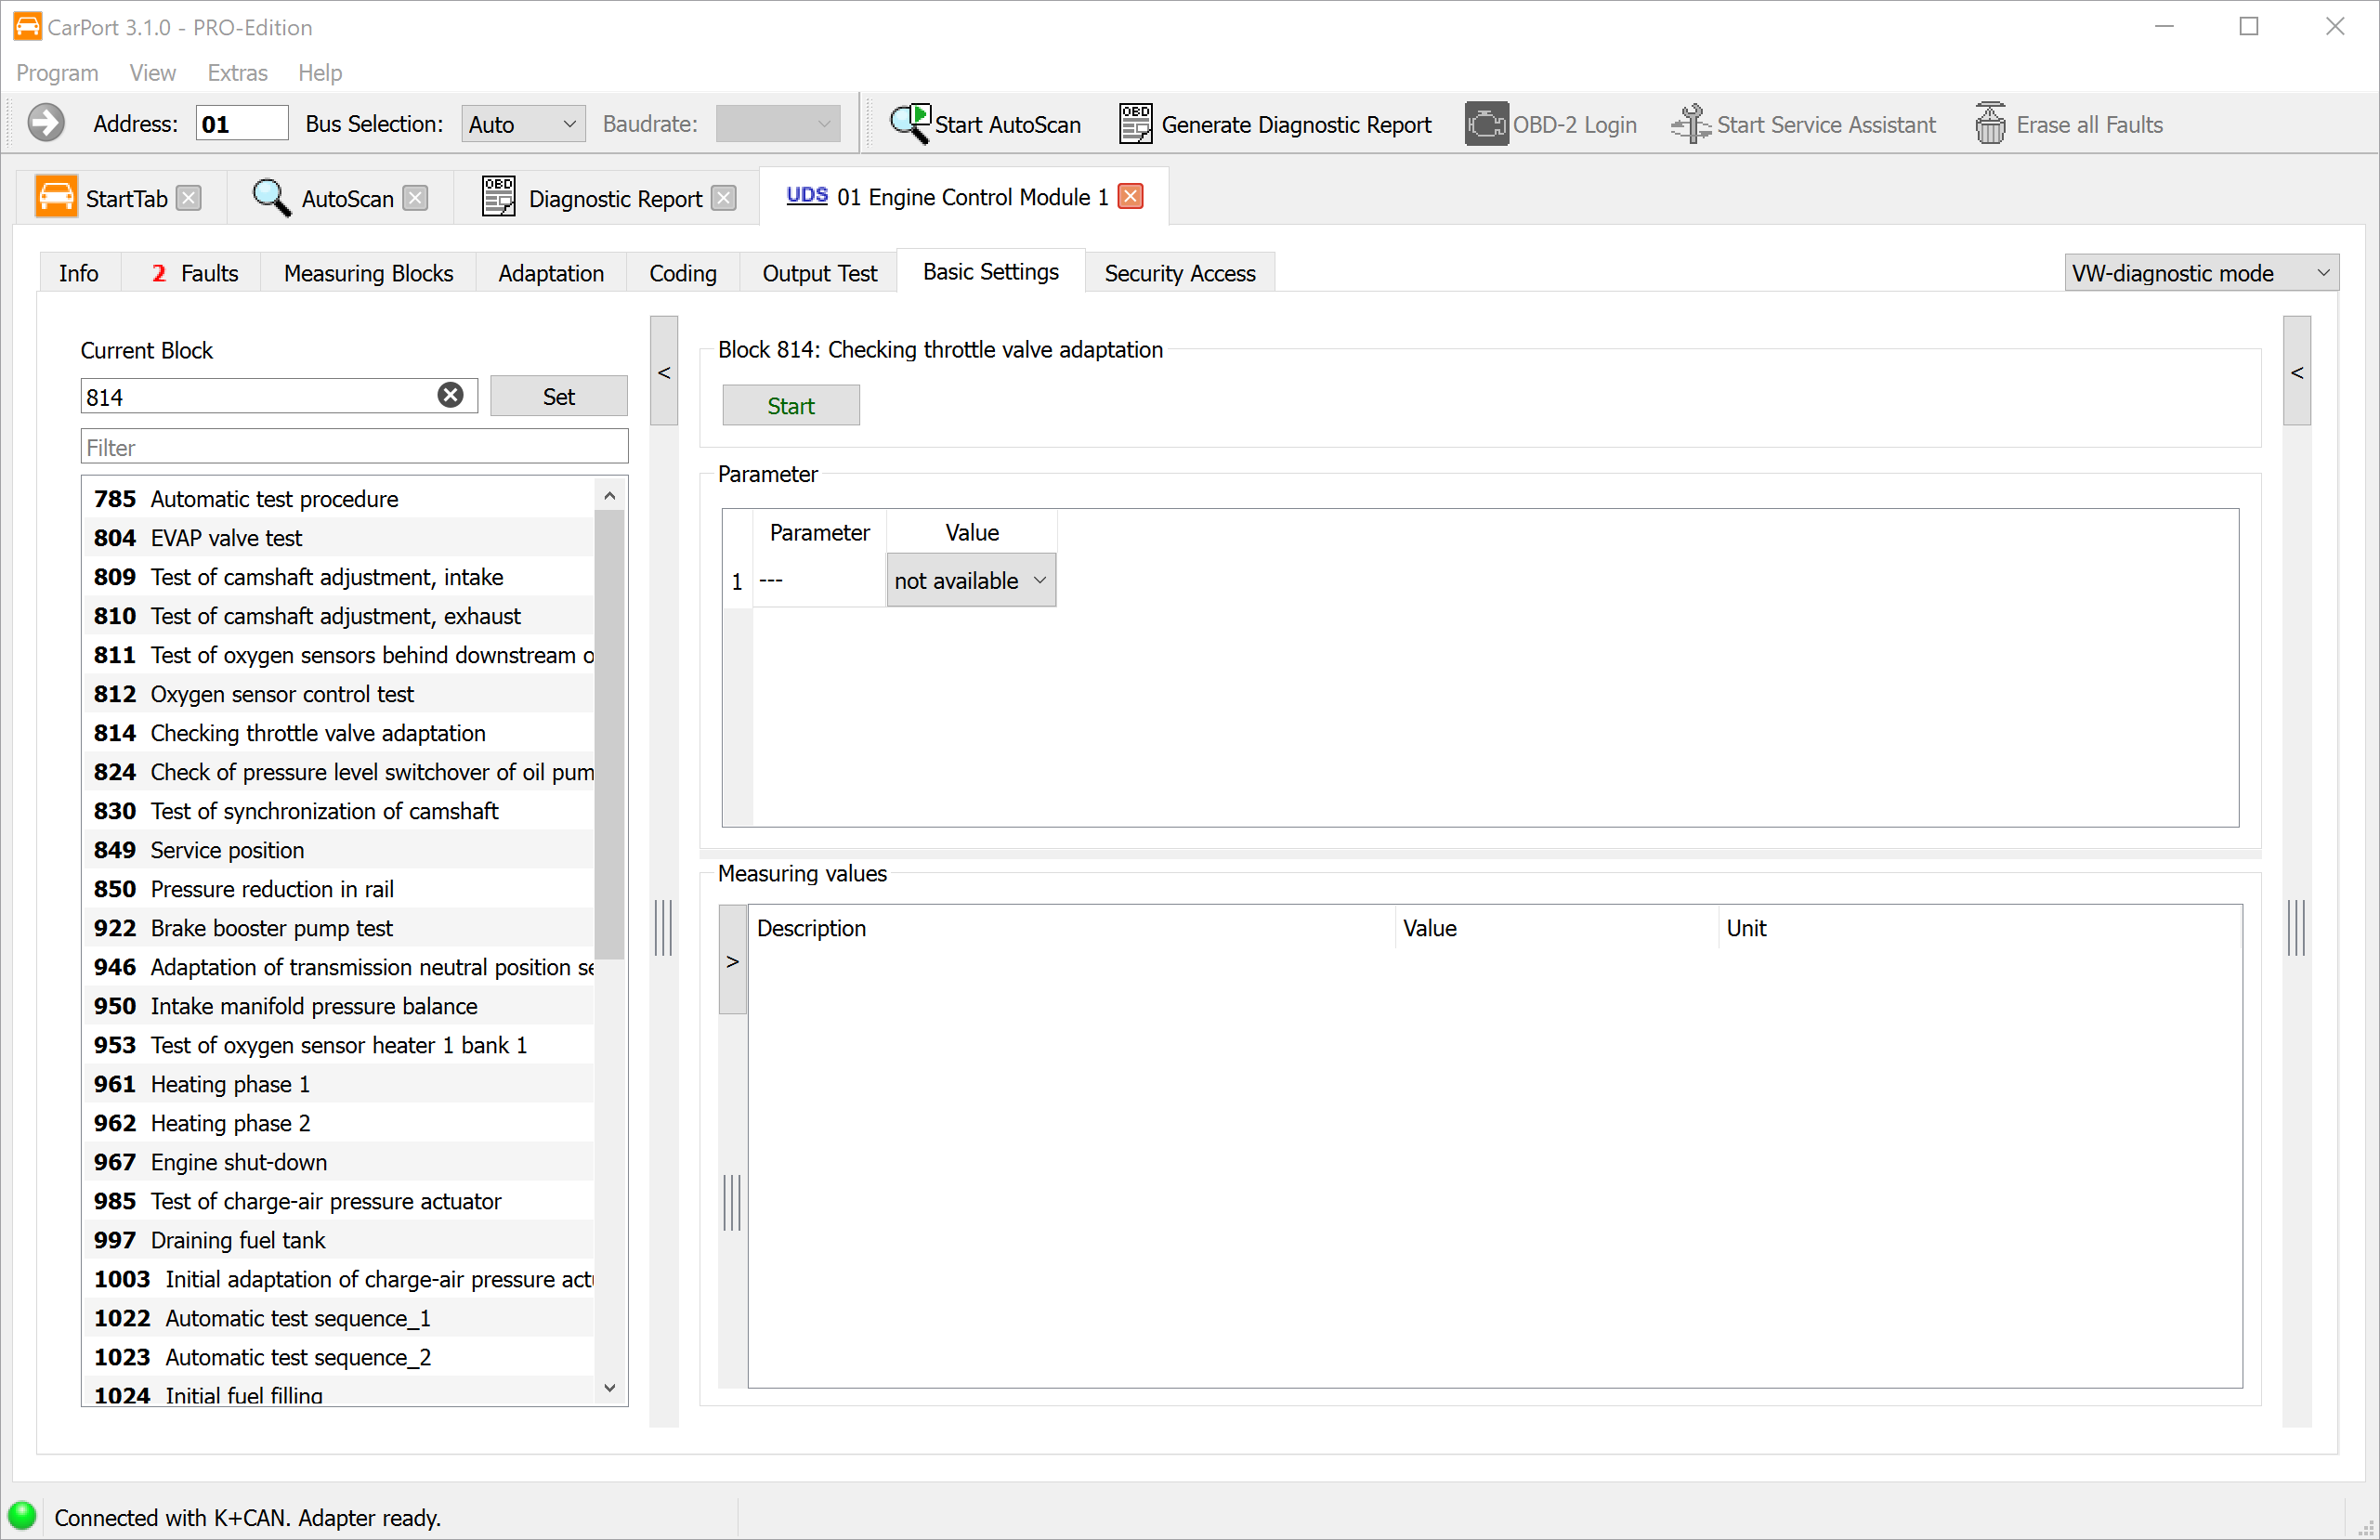
Basic settings (German: Grundeinstellung) instruct an ECU to run an initialization or calibration routine. In the process, the ECU brings a mechanical or electronic component into a defined initial state or re-learns its current position or characteristic values.
Unlike adaptation, where you change values manually, basic settings run an automated process in the ECU itself. CarPort merely sends the start command—the ECU carries out the actual calibration on its own.
When are basic settings necessary?
Basic settings are typically required after replacing or repairing components so that the ECU correctly recognizes and calibrates the new parts. Common use cases include:
- Adapting the throttle body: After replacing or cleaning the throttle body, the ECU has to re-learn the mechanical stop positions (fully closed / fully open).
- Calibrating the steering angle sensor: After work on the steering or suspension, the zero point of the steering angle sensor must be re-learned so that ESP and the driver assistance systems work correctly.
- Electronic parking brake (EPB): Before replacing the brake pads, the parking brake must be put into service mode (retracting the pistons). After installation, it's reactivated and calibrated via basic settings.
- Bleeding the cooling system: After filling the cooling system (e.g., after replacing the radiator or timing belt), the ECU starts an automatic bleeding cycle in which the pump and valves drive air bubbles out of the circuit.
⚠️ Caution: Basic settings actively intervene in the ECU's operation. Especially on safety-relevant systems (brakes, steering, airbag), routines that are faulty or run at the wrong time can lead to dangerous situations. Only run basic settings if you know which routine you're starting, and observe the prerequisites (e.g., engine off, steering in the straight-ahead position, vehicle on level ground).
The procedure differs depending on the diagnostic protocol.
Basic settings with KWP1281 / KWP2000
With the older protocols, basic settings are organized in numbered blocks—similar to the measuring blocks.
Step-by-step instructions:
- Select the block you want from the list or enter the block number manually (if no label data is available).
- Click
Start.- KWP1281: CarPort first reads the measured values of the selected block and displays them. These values are usually directly related to the basic setting and are used to monitor the process.
- KWP2000: CarPort starts the routine on the ECU without activating the basic setting right away. If available, related measured values are displayed.
- Click
Activateto activate the actual basic setting. The ECU now performs the necessary calibration steps (e.g., moving the throttle body to its stops, measuring sensor values). - Watch the measured values displayed to follow the progress and result of the basic setting.
- When it's complete, CarPort displays the message Basic Settings finished.
- Click
Deactivateto end the basic setting and return to normal operating mode.
💡 KWP1281 special feature: The Next Block button lets you switch directly to the next block without leaving basic settings. On some ECUs, the blocks have to be processed in a specific order because they depend on each other. Follow the instructions in the label data or the workshop documentation.
Basic settings with UDS
On ECUs with the UDS protocol, basic settings are stored as named routines in the ODX data.
Step-by-step instructions:
- CarPort shows the available basic settings from the ODX data with plain-text names (e.g., “Throttle body adaptation,” “Calibrate steering angle sensor”). Select the routine you want.
- Click
Startto start the routine. The basic setting becomes active immediately—there's no separate activation step as with KWP1281/KWP2000. - Monitor the progress using the measured values displayed.
- After successful completion, CarPort displays the message Basic Settings finished.
Measured values during basic settings (UDS):
As with the output test, CarPort automatically displays status information while a basic setting is running, provided the ECU supplies it:
| Measured value | Description |
|---|---|
| Basic setting status | Current state (running, completed, aborted) |
| Operating instruction | Instructions from the ECU to the user (e.g., “Turn the steering wheel to the left”) |
| Currently running routine | Name of the active calibration routine |
| Current test step | Position within a multi-step procedure |
| Test steps remaining | Steps remaining until completion |
| Reason for abort | Reason if the routine was terminated early |
You can also add your own measured values for monitoring (e.g., engine speed, temperature, sensor values) to keep an eye on other relevant parameters during the basic setting.
Aborting and error messages
You can abort the basic setting manually at any time using the Stop button. If the ECU aborts the routine on its own (e.g., because prerequisites weren't met or a fault was detected), the message Basic Settings aborted by ECU appears. In this case, you should check the measured values displayed and the fault memory to determine the cause.
Output test
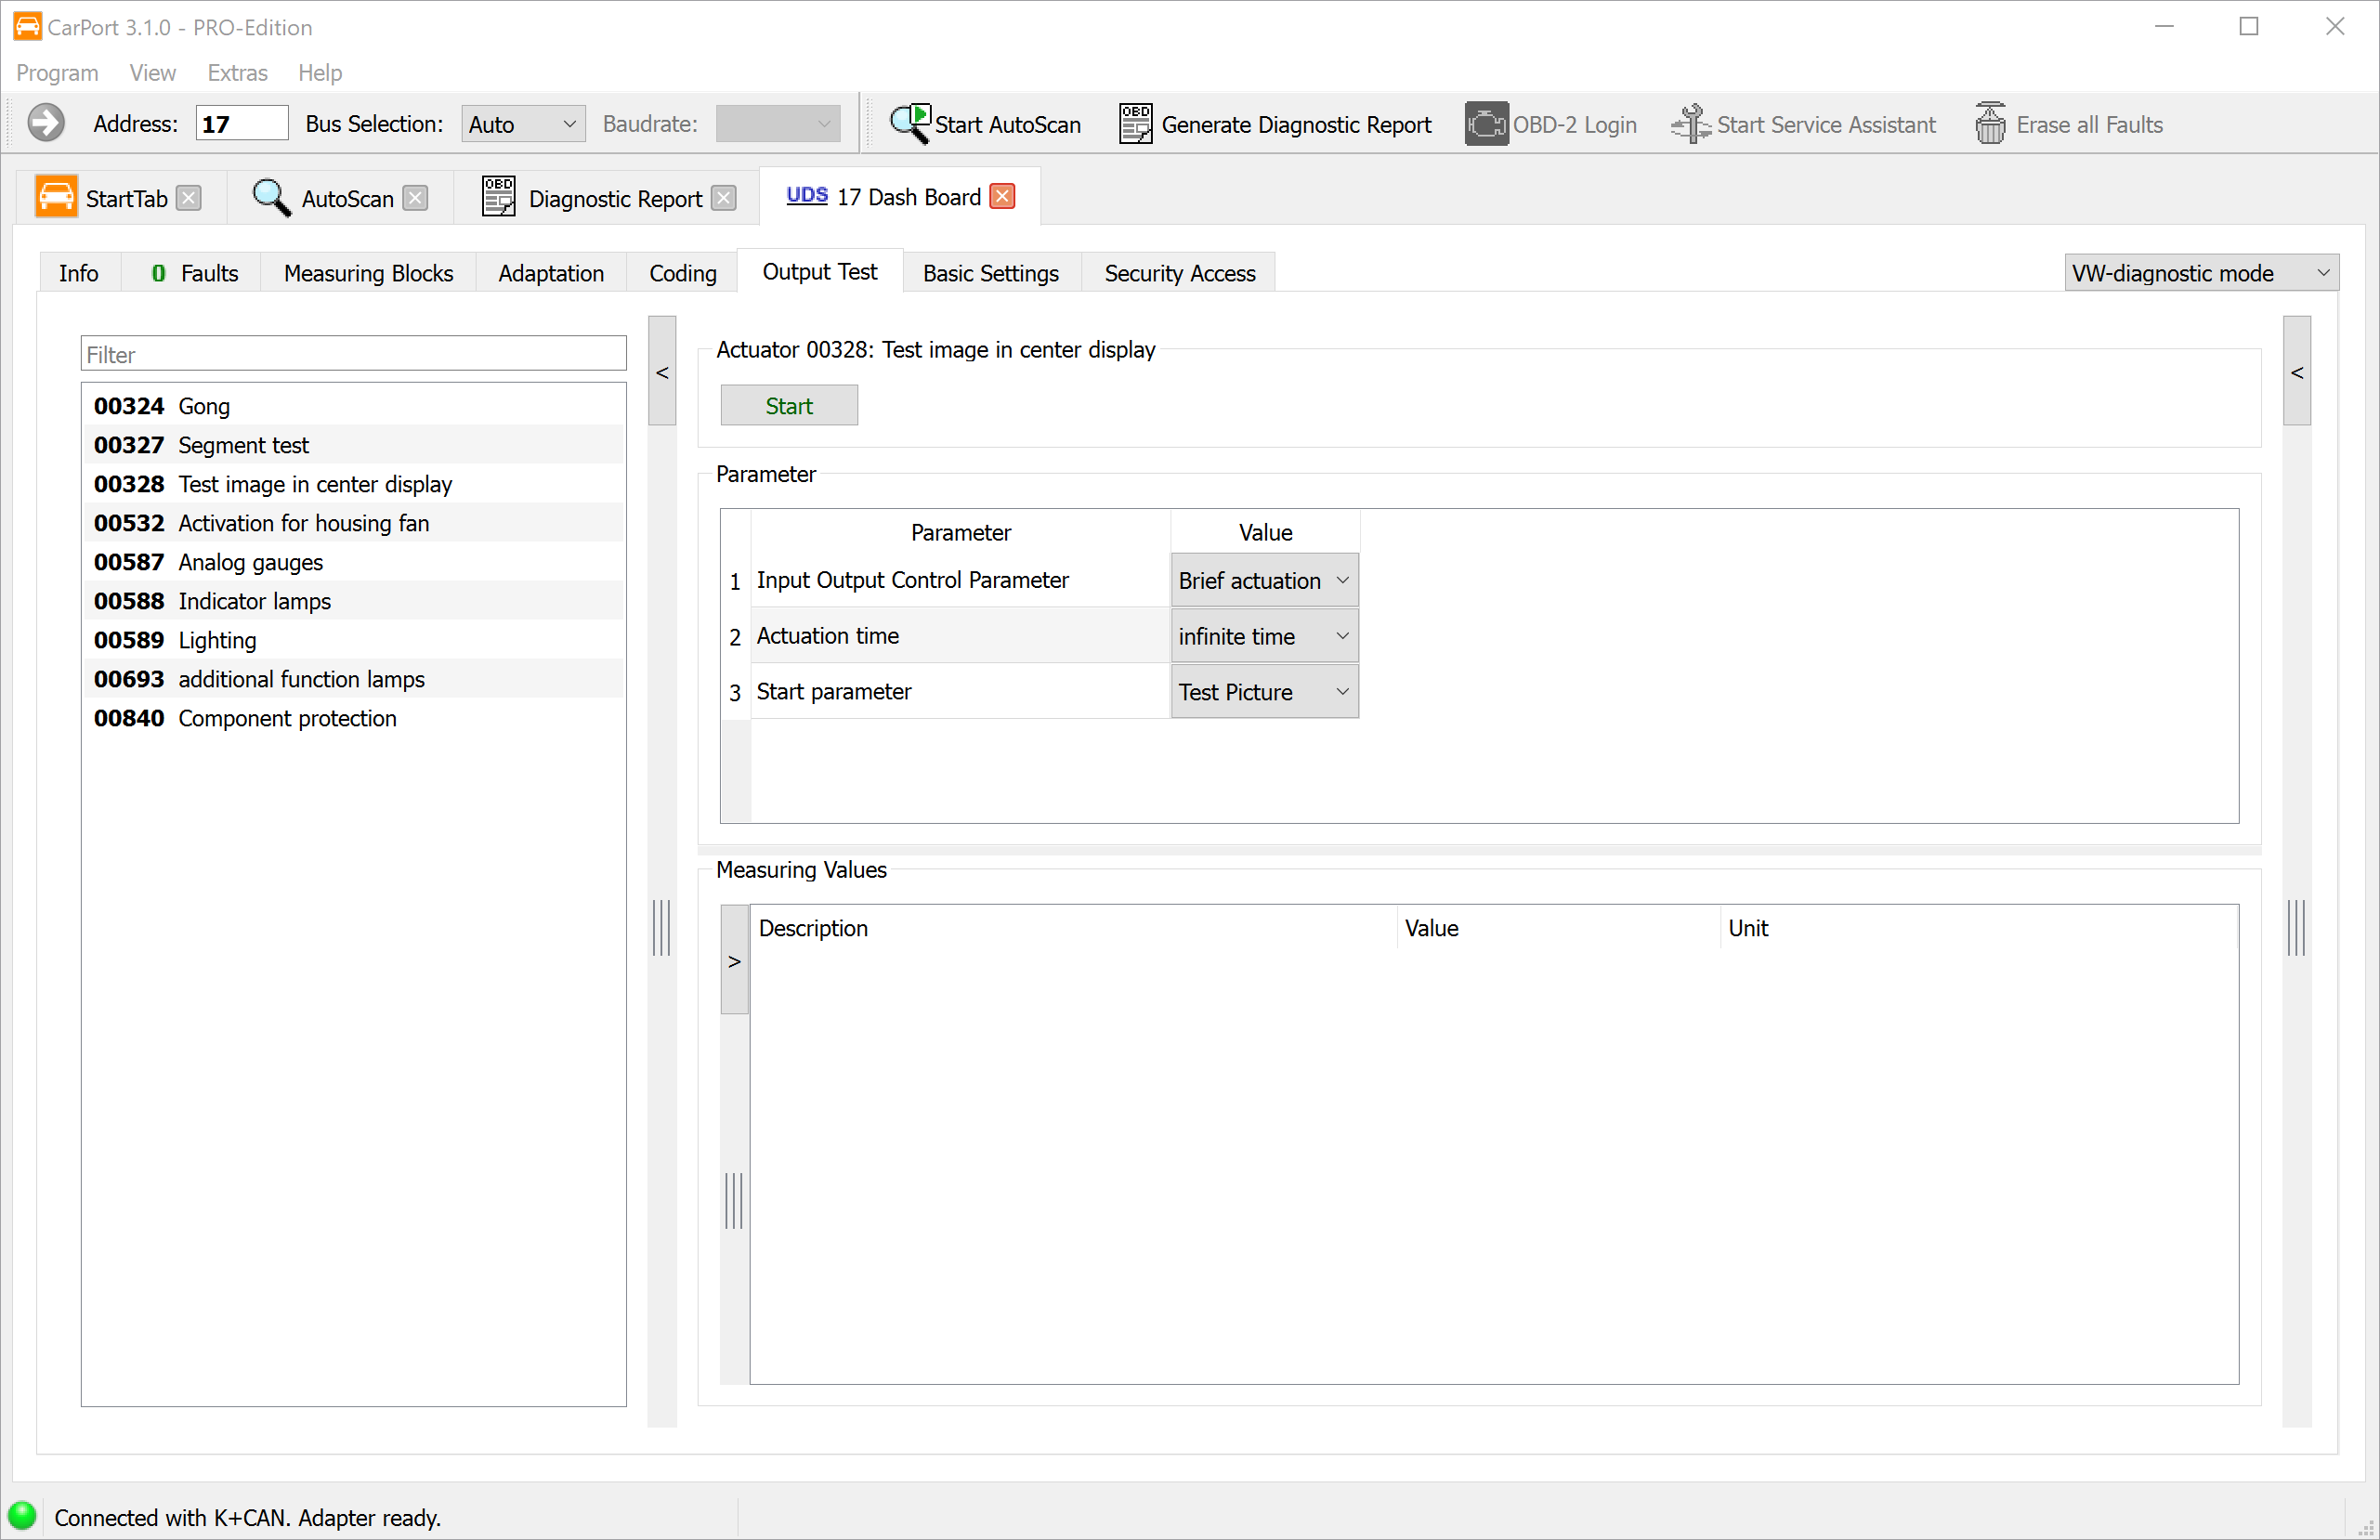
The output test lets you activate individual actuators of an ECU specifically in order to check their electromechanical function in isolation from normal driving operation. Actuators are all components that the ECU actively controls to perform a physical action—e.g., valves, relays, electric motors, lights, or solenoid valves.
Typical use cases:
- Troubleshooting: Check whether an actuator responds when activated (e.g., does a relay click, does a motor turn?).
- Function check after a repair: Make sure a newly installed component works correctly.
- Leak testing: Activate individual valves specifically for pressure testing.
⚠️ Caution: During an output test, actuators are activated independently of the normal control loop. Make sure the vehicle is parked safely and no one is put at risk. Some tests (e.g., fan run-on, fuel pump) can cause unexpected movements or noises.
Depending on the diagnostic protocol, CarPort distinguishes between two modes: the sequential and the selective output test.
Sequential output test (KWP1281 / KWP2000)
In the sequential output test, the ECU activates all available actuators one after another in a fixed, predefined order. You can step through the individual actuators and observe how they respond.
Step-by-step instructions:
- Open the
Output Testtab in the connected ECU. - The first actuator in the sequence is activated automatically. CarPort shows the name of the actuator currently being activated (if label data is available).
- Observe how the vehicle responds (e.g., a relay clicking, a flap moving, a lamp lighting up).
- Click
Nextto advance to the next actuator in the sequence. - To activate an actuator again, click
Activate. - If available, related measured values are displayed that provide information about the actuator's status (e.g., current draw, feedback signal).
💡 Note: The order and number of available actuators are determined entirely by the ECU and can't be changed.
Selective output test (KWP2000 / UDS)
The selective output test lets you pick individual actuators and activate them one at a time, without having to run through the entire sequence. This is particularly efficient if you only want to check one specific component.
With KWP2000:
- Click
Start Scan...to determine which actuators the ECU supports. CarPort scans the available tests and displays them in a list. - Select the output test you want from the list.
- Start the test with
Start. - Observe the response and the measured values displayed (if available).
- End the test with
Stop.
With UDS:
Modern ECUs with the UDS protocol offer extended options:
- CarPort automatically determines the available output tests from the ODX data and displays them with plain-text names in a list.
- Select the test you want.
- Depending on the actuator, you can set control parameters (e.g., duration, intensity, direction)—the options available depend on the respective ECU.
- Start the test with
Startand end it withStop.
Measured values during the test (UDS):
While an output test is running, CarPort automatically displays status information, provided the ECU supplies it:
| Measured value | Description |
|---|---|
| Output test status | Current state (running, completed, aborted) |
| Operating instruction | Instructions from the ECU to the user |
| Currently running routine | Name of the active test routine |
| Current test step | Position within a multi-step test |
| Test steps remaining | Steps remaining until completion |
| Reason for abort | Reason if the test was terminated early |
You can also add your own measured values for monitoring (e.g., current draw, temperature, fault flags) to observe additional diagnostic data during the test.
End of the output test:
When all test steps are complete, CarPort displays the message Output Test finished. If the ECU aborts the test early (e.g., because it detected a fault or triggered a safety shutdown), the message Output Test aborted by ECU appears.